Plamia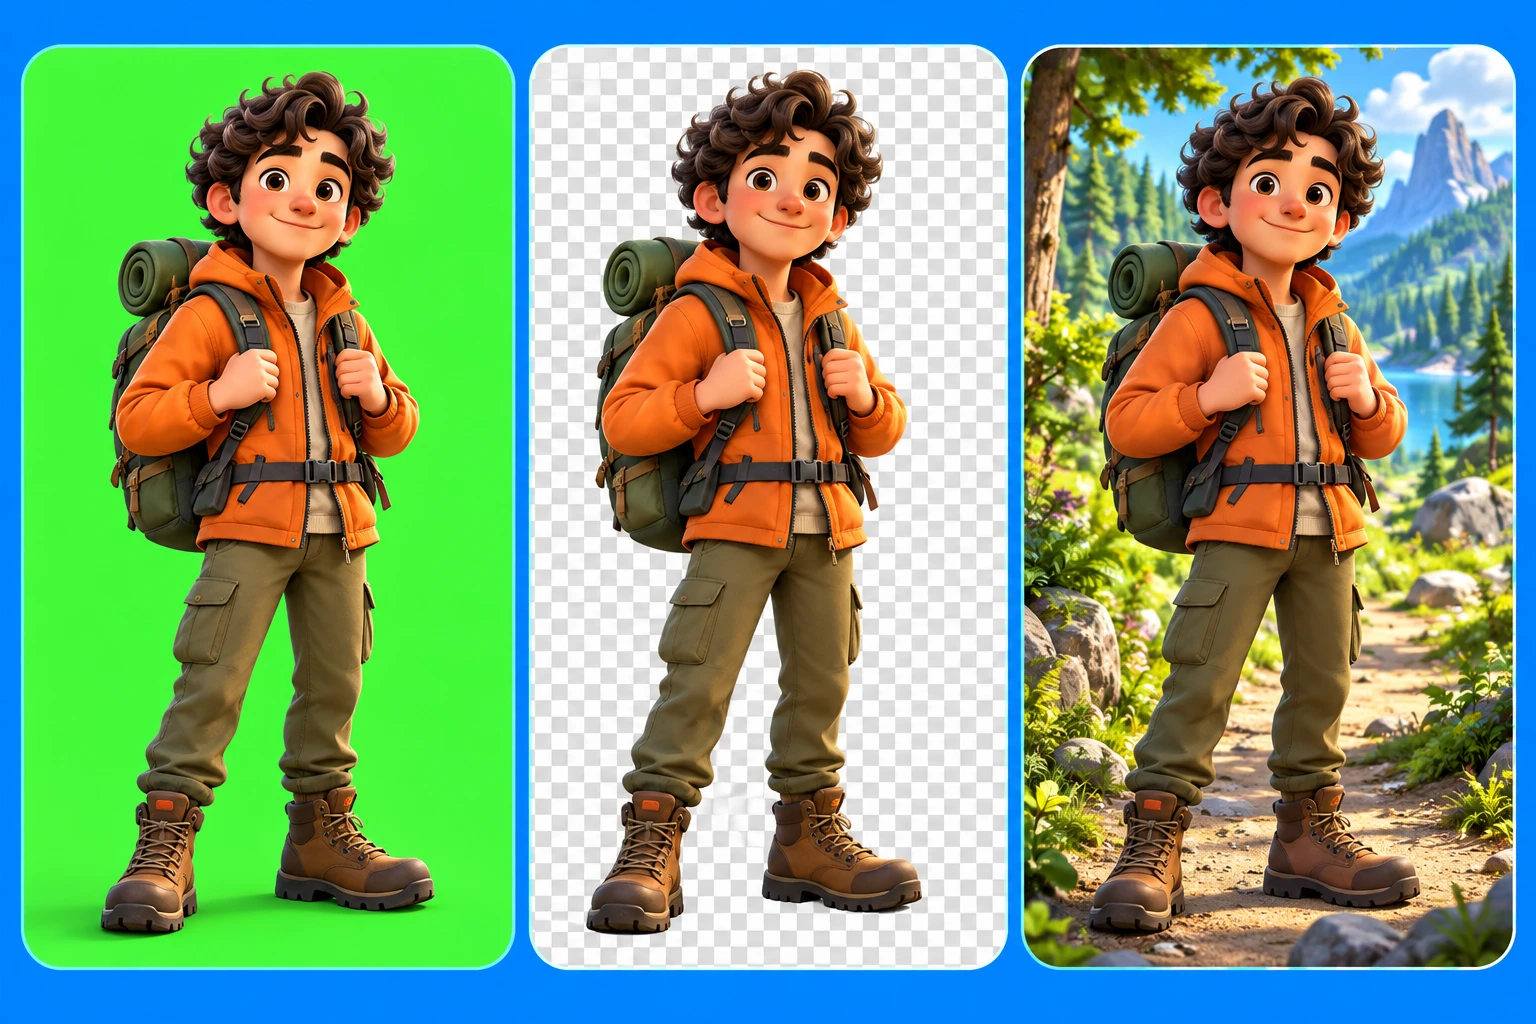
To use a green-screen video in Plamia, upload it through Keep original, then open the clip’s Chroma key controls in the editor. Pick the background color, adjust Tolerance and Softness, and select Apply. Place the transparent clip over your scene and use Save to assets if you want to reuse it.
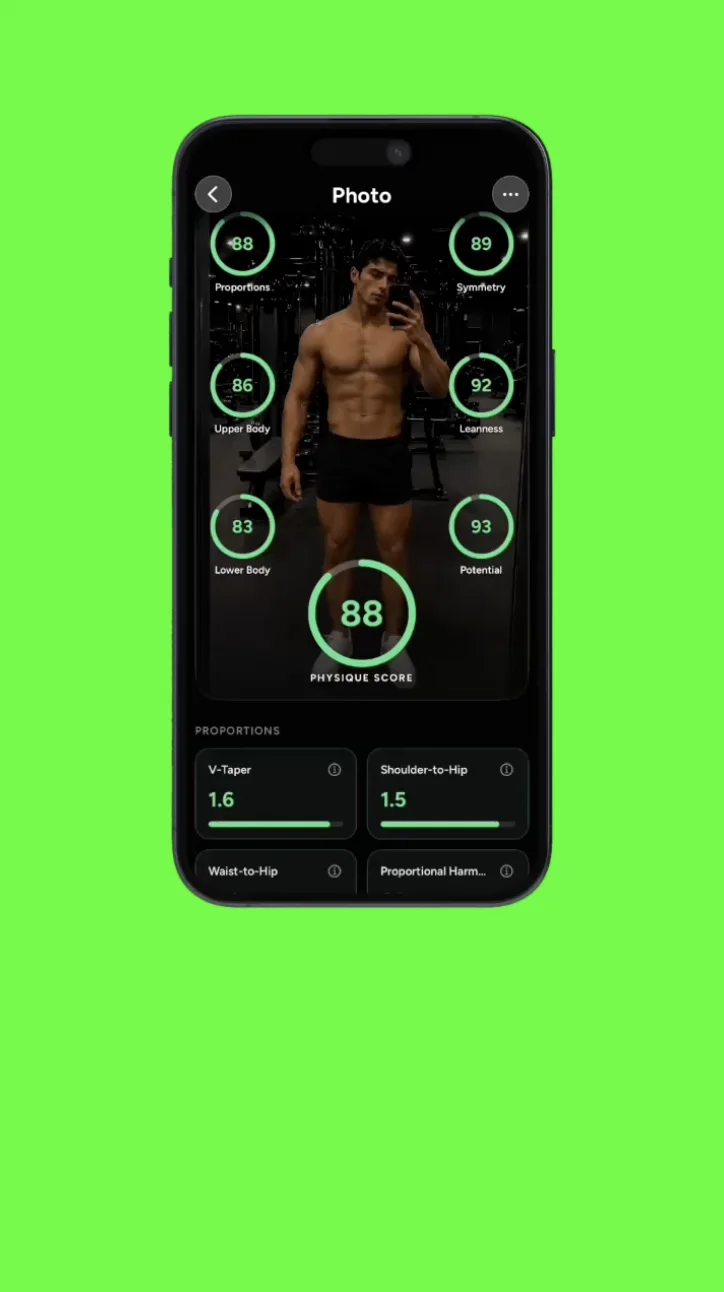
This guide uses a Zigma promo clip to show the complete Plamia workflow: upload the original video without repainting it, optionally study it for AI matching, remove the green background with chroma key, and save the transparent result for future projects.
- PrepareRecord a short clip against a clean, evenly colored green background.
- UploadAdd it through Keep original so Plamia keeps the original pixels.
- Study (optional)Enable paid analysis if you want the director to understand the clip for scene matching.
- KeyRemove the green background in the editor and inspect the transparent edges.
- SaveStore the keyed clip in Assets so it can be reused in later videos.
1. Prepare a clean green-screen clip.
Use a flat, uniform green background. Avoid gradients, visible texture, strong shadows, and changing exposure. The cleaner the color is, the easier it is to remove without damaging the subject.
- Keep green clothing, graphics, and reflections out of the subject.
- Leave clear space around moving hands, products, and screen edges.
- Use even light to reduce green spill around the outline.
- Trim the source to the useful moment before uploading it.
Plamia accepts clips up to 60 seconds and 100 MB in this flow. MP4, MOV, and WebM files are supported.
2. Upload it through Keep original.
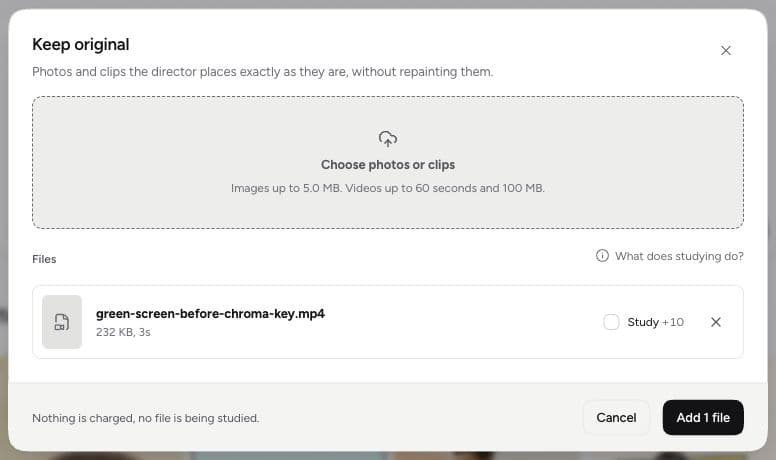
Open Video settings using the gear beside Create video. Expand Media, find Original media, and select Add media. In the Keep original dialog, select Choose photos or clips and pick your video. This preserves the original footage instead of restyling it through the composer’s photo control.
Study is off by default. Enable it only if you want Plamia to analyze the subject, action, text, and useful moments for scene matching. This optional analysis costs credits; the dialog shows the charge before you confirm. You can leave it off, add the file, and adjust its placement yourself in the editor.
Select Add 1 file to confirm the upload. Study does not remove the green background or apply chroma key. Removing the background is a separate editor step described below.
3. Create the video and find the clip.
Create the video after the script, voice, source media, and visual style are ready. The original green-screen file stays unchanged during generation. Chroma key is an editor step, so seeing green in the editor before you apply it is expected.
Open Media, choose the Project tab, and locate the uploaded clip. Check where it appears on the timeline. If the first placement does not match the intended line, add it at the playhead, replace the selected clip, or move it to another track before processing the background.
If you are starting from a script, the complete script-to-video workflow explains how to review the narration, scenes, captions, and pacing as one story.
4. Remove the background with Chroma key.
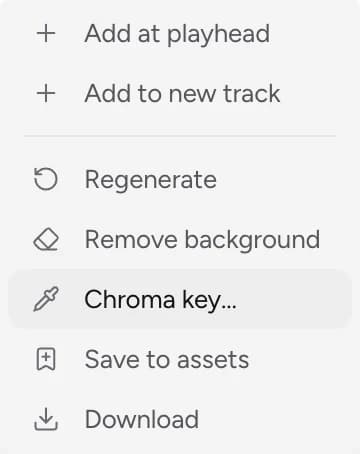
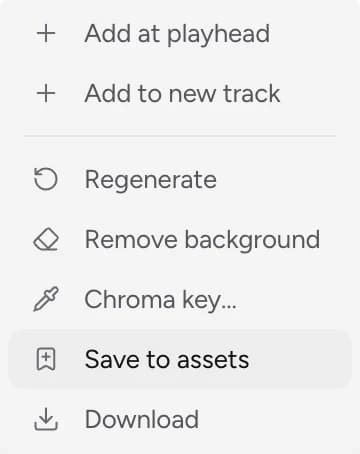
Open the clip card's three-dot menu and select Chroma key.... The panel starts with a green key color. Use Pick from canvas when the recorded green does not match the default exactly.
Adjust Tolerance first, then Softness. Watch thin details, rounded corners, shadows, and moving edges while you tune the controls. Select Apply when the background is transparent and the subject remains intact.
Plamia creates a transparent WebM file and updates every use of the original clip in the current project. You do not need to replace the clip on each timeline track.
- Key colorChoose the green to remove.
Start with #00ff00 or use Pick from canvas to sample the actual background.
- ToleranceControl the color range.
Increase it only until the remaining green disappears. Too much can remove detail.
- SoftnessBlend the edge.
Add enough softness to reduce a hard outline without making the subject look blurred.
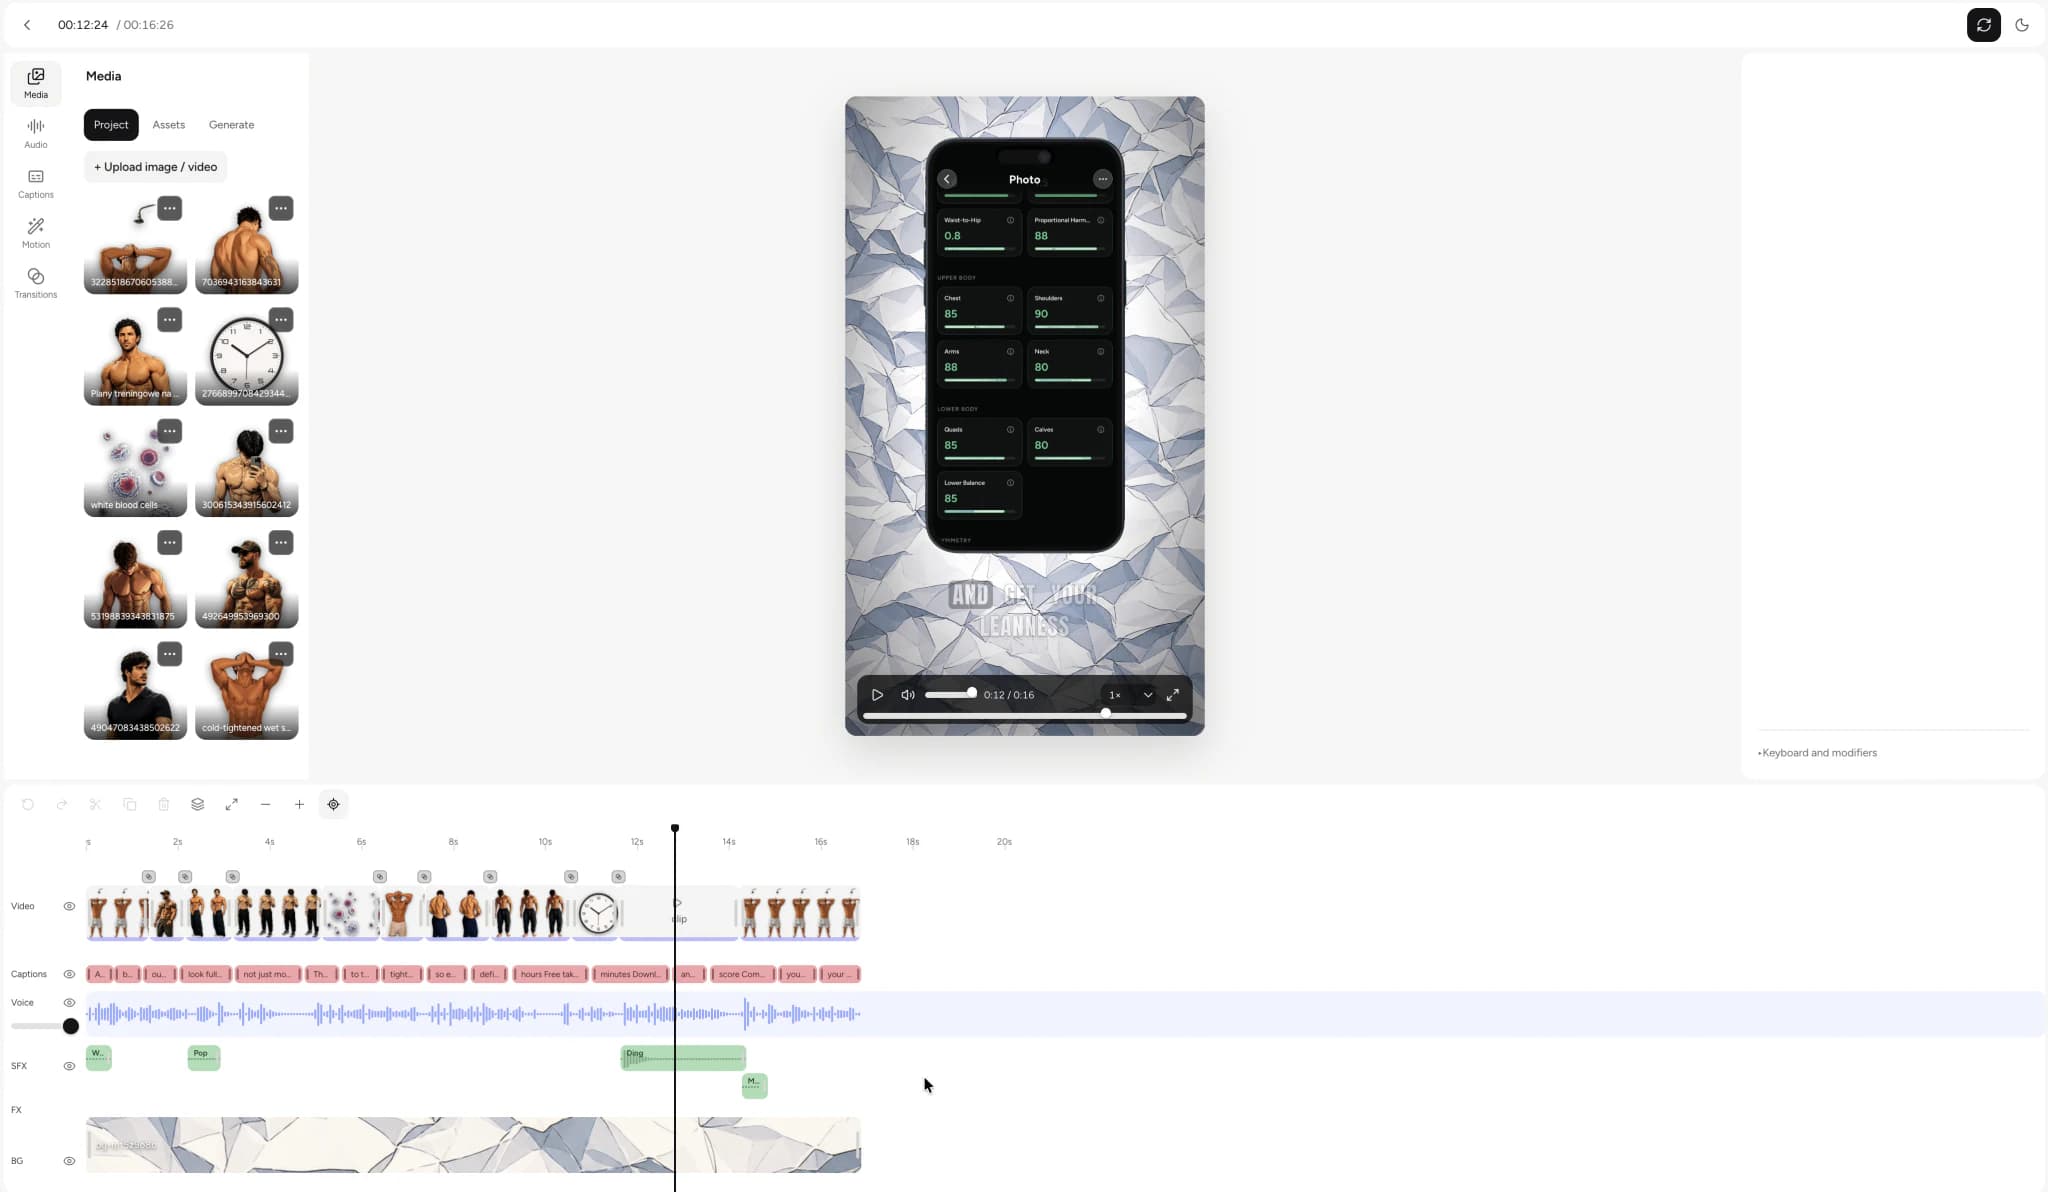
5. Watch the source clip and finished video.
Preview the full scene after processing. Look for a green fringe, missing parts of the subject, transparent dark areas, or a soft halo that becomes visible over the new background.
Check the clip while it is moving, not only on one paused frame. Motion blur and reflections can reveal keying problems that are easy to miss in a still image.
6. Save the transparent clip for future videos.
Open the updated clip's three-dot menu and select Save to assets. Do this after applying chroma key so the reusable file is the transparent version. Give it a clear name that describes the subject and action.
In a future project, open Video settings, expand Media, and enable Use my library. Select Choose mediato pick the saved clip. Analyzed library media can help Plamia match existing material to the script, but you should still review the placement in the timeline.
Plamia can choose a useful moment, fit the clip to the vertical frame, adjust its scale and position, and plan its entrance and motion. Review the resulting timeline before export, especially when several saved clips show similar content.
Common questions about green-screen video
Does Study remove the green background?
No. Study analyzes the file for scene matching. Chroma key removes the selected background color in the editor. You do not need to enable Study to use Chroma key.
Why is there still a green outline around the subject?
Sample the actual background with Pick from canvas, then increase Tolerance gradually. Add a small amount of Softness and check moving edges. Uneven lighting and green reflections on the subject can require a cleaner source recording.
Can I reuse the transparent clip in another video?
Yes. Apply Chroma key first, then choose Save to assets from the updated clip’s menu. In a new project, use Video settings, Media, Use my library, and Choose media to select it.